
Dealer Admin Setup (XR)
To connect multiple XR Series panels to communicate with each other, follow the steps below.
Host Panel Programming
Navigate to Dealer Admin and select the system you want to be the host panel (the panel where we will be programming the connection to all other panels).
In Programming, go to Device Setup and click + Add Device.
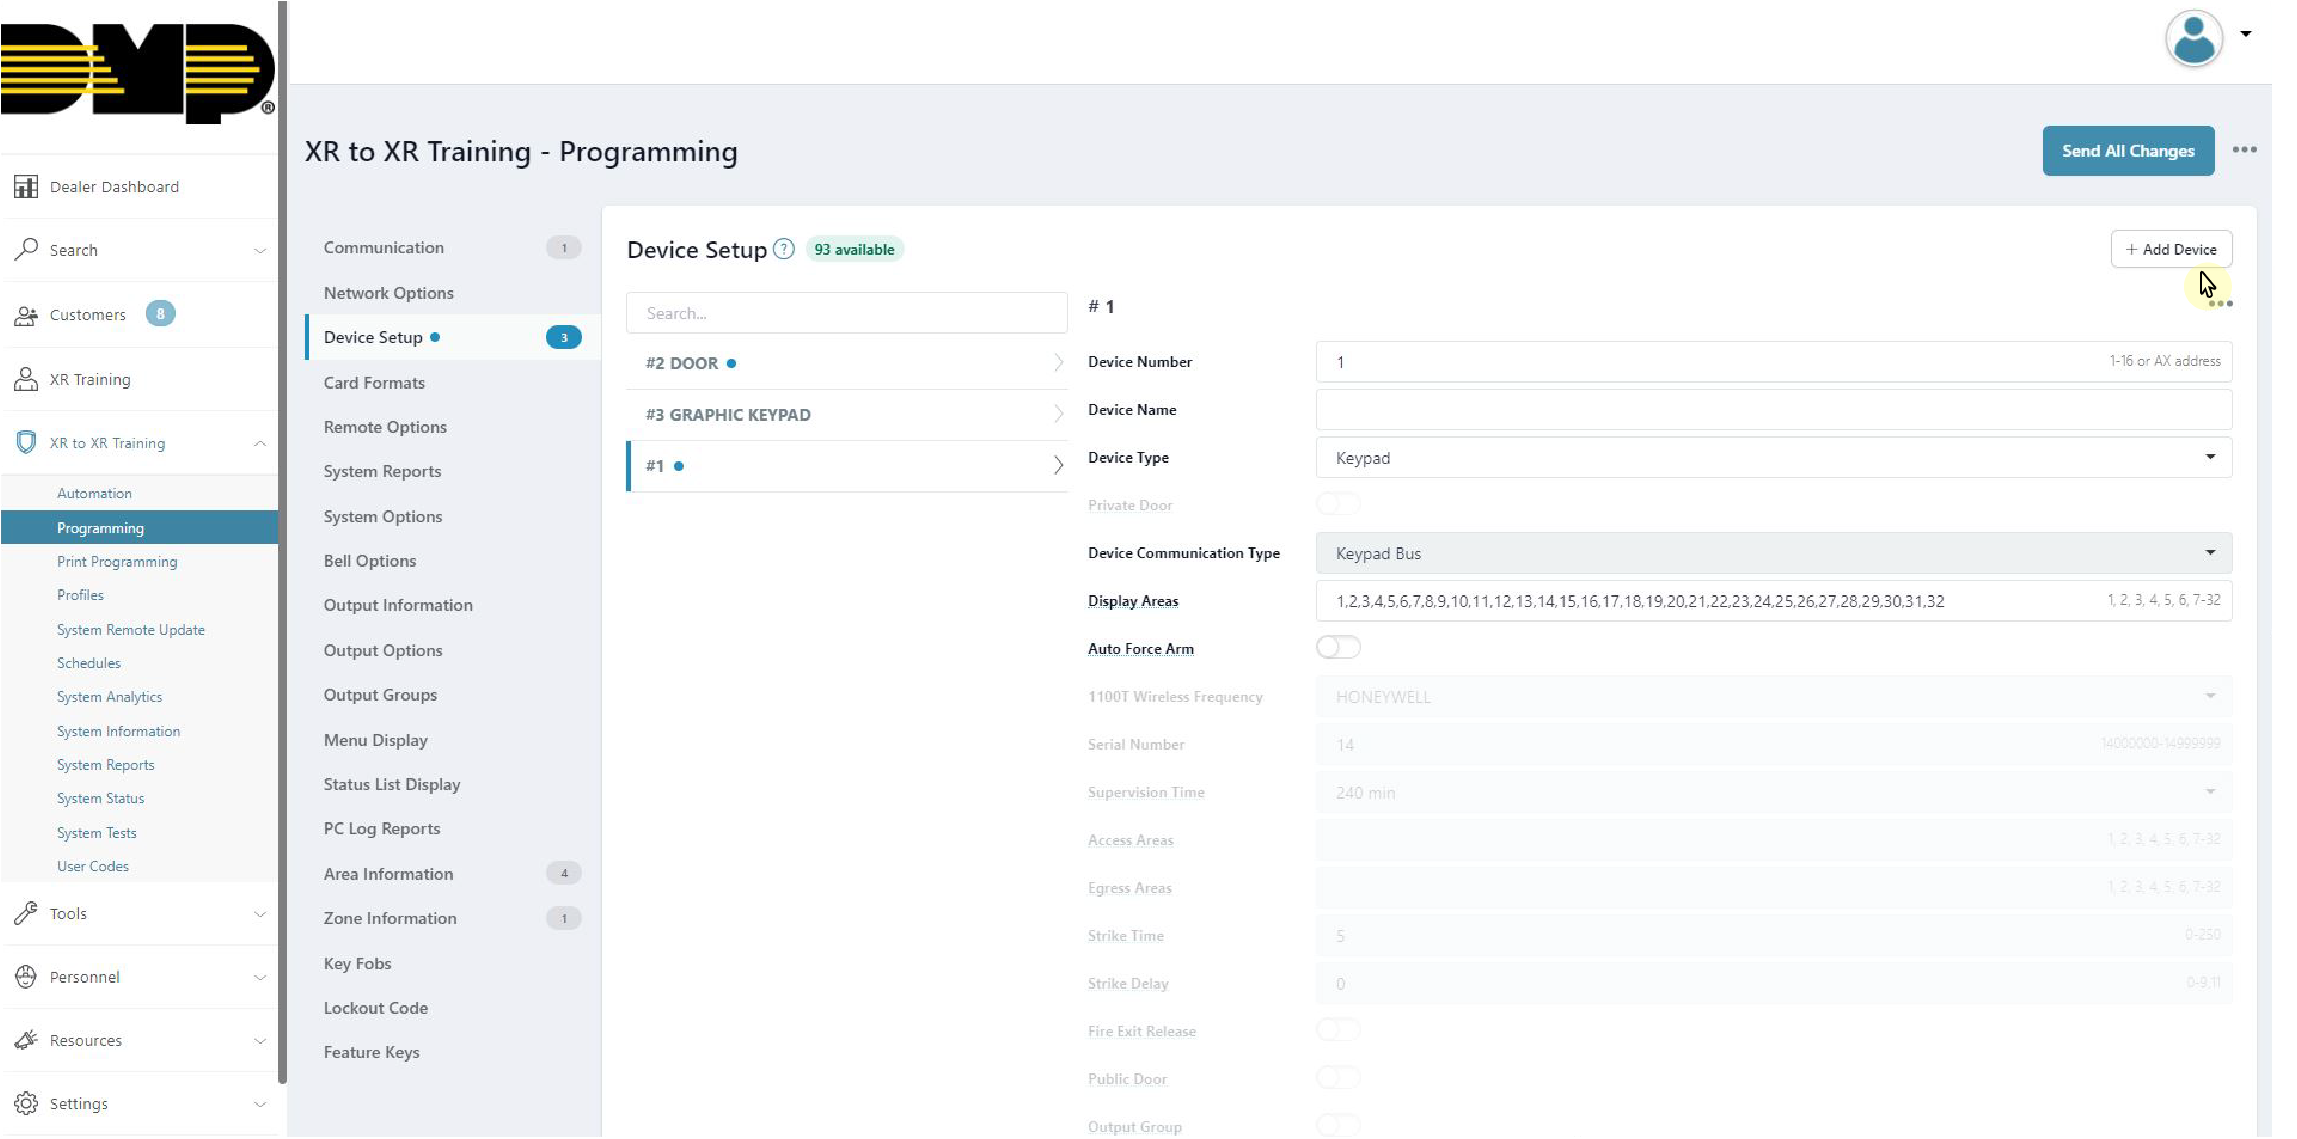
Add Device
Add a Device Number and a Device Name.
Note: Device 1 cannot be an XR Series panel. Keypad Bus device numbers and LX-Bus device numbers are available to use for an XR panel connection.
Add Device Number and Name
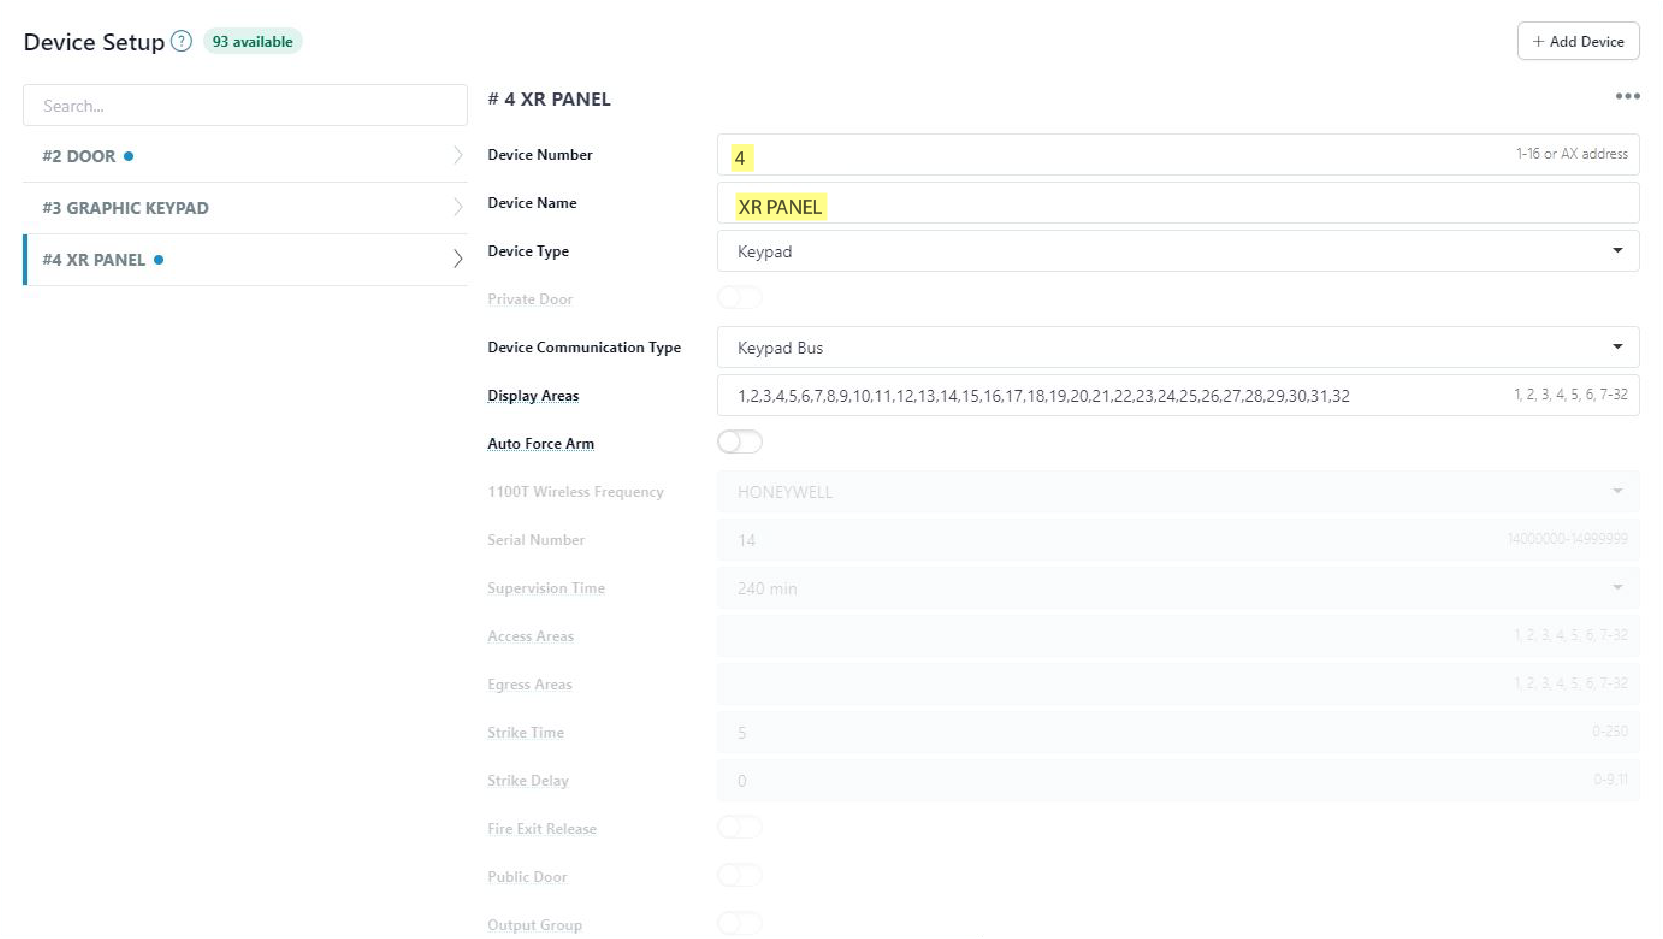
At Device Type, select XR Panel.
Note: This option is only available if your panel is updated to firmware Version 231. All panels need to have firmware Version 231 to communicate with each other.
Add Device Type
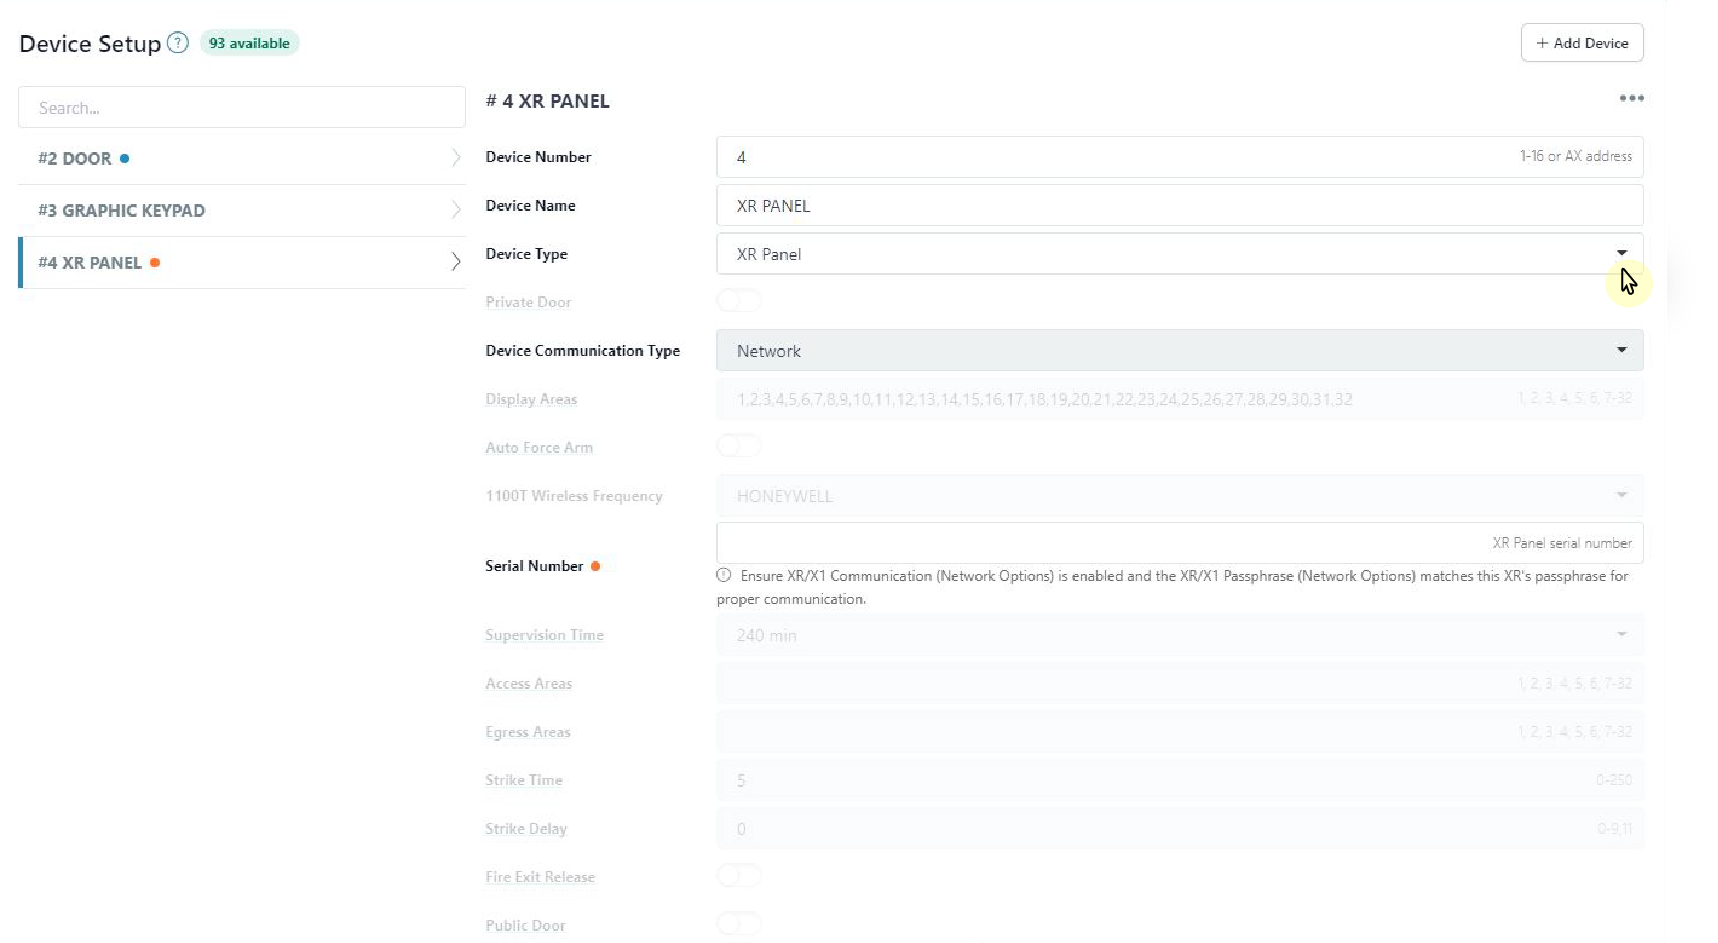
The Device Communication Type will automatically populate as Network.
Note: All panels need to be connected to the same network in order to communicate with each other.
At Serial Number, type in the serial number for the panel you are wanting to connect to. The serial number will be located on the panel PCB. Refer to the image below.
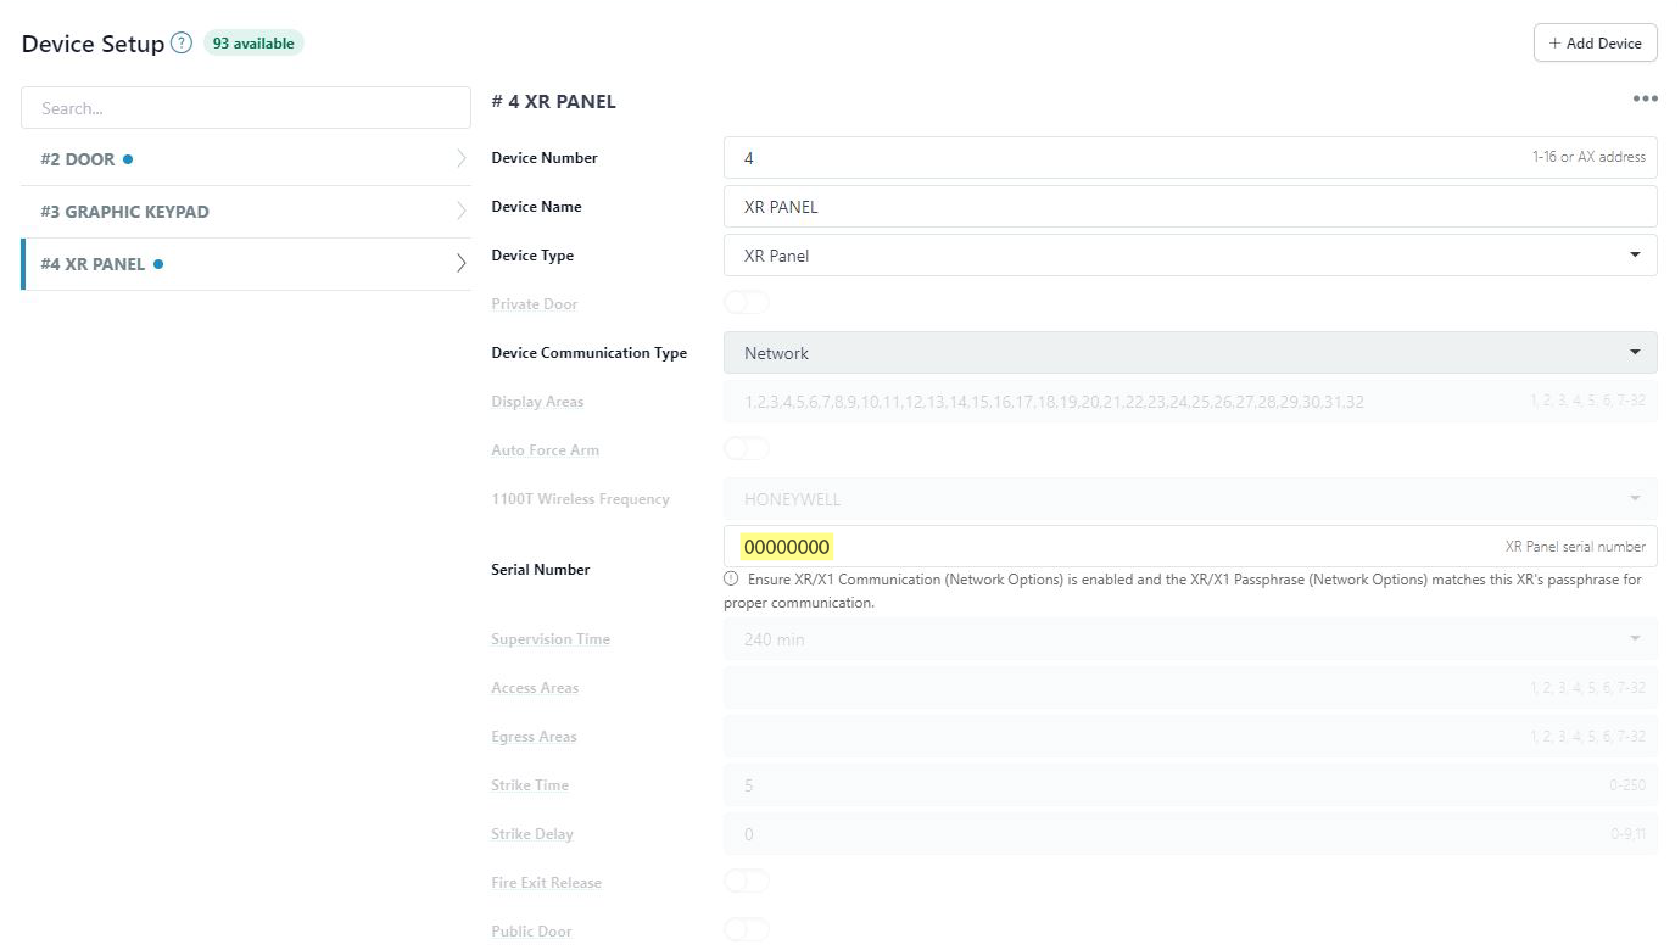
Add Panel Serial Number
Go to Network Options and ensure that the following fields are completed.
734N Listen Port - A port is filled in (Default is 2002)
734N Passphrase - A passphrase is filled in (Programmer/Technician can choose the passphrase)
XR/X1 Communication - The toggle is turned ON
XR/X1 Passphrase - A passphrase is filled in (Programmer/Technician can choose the passphrase)
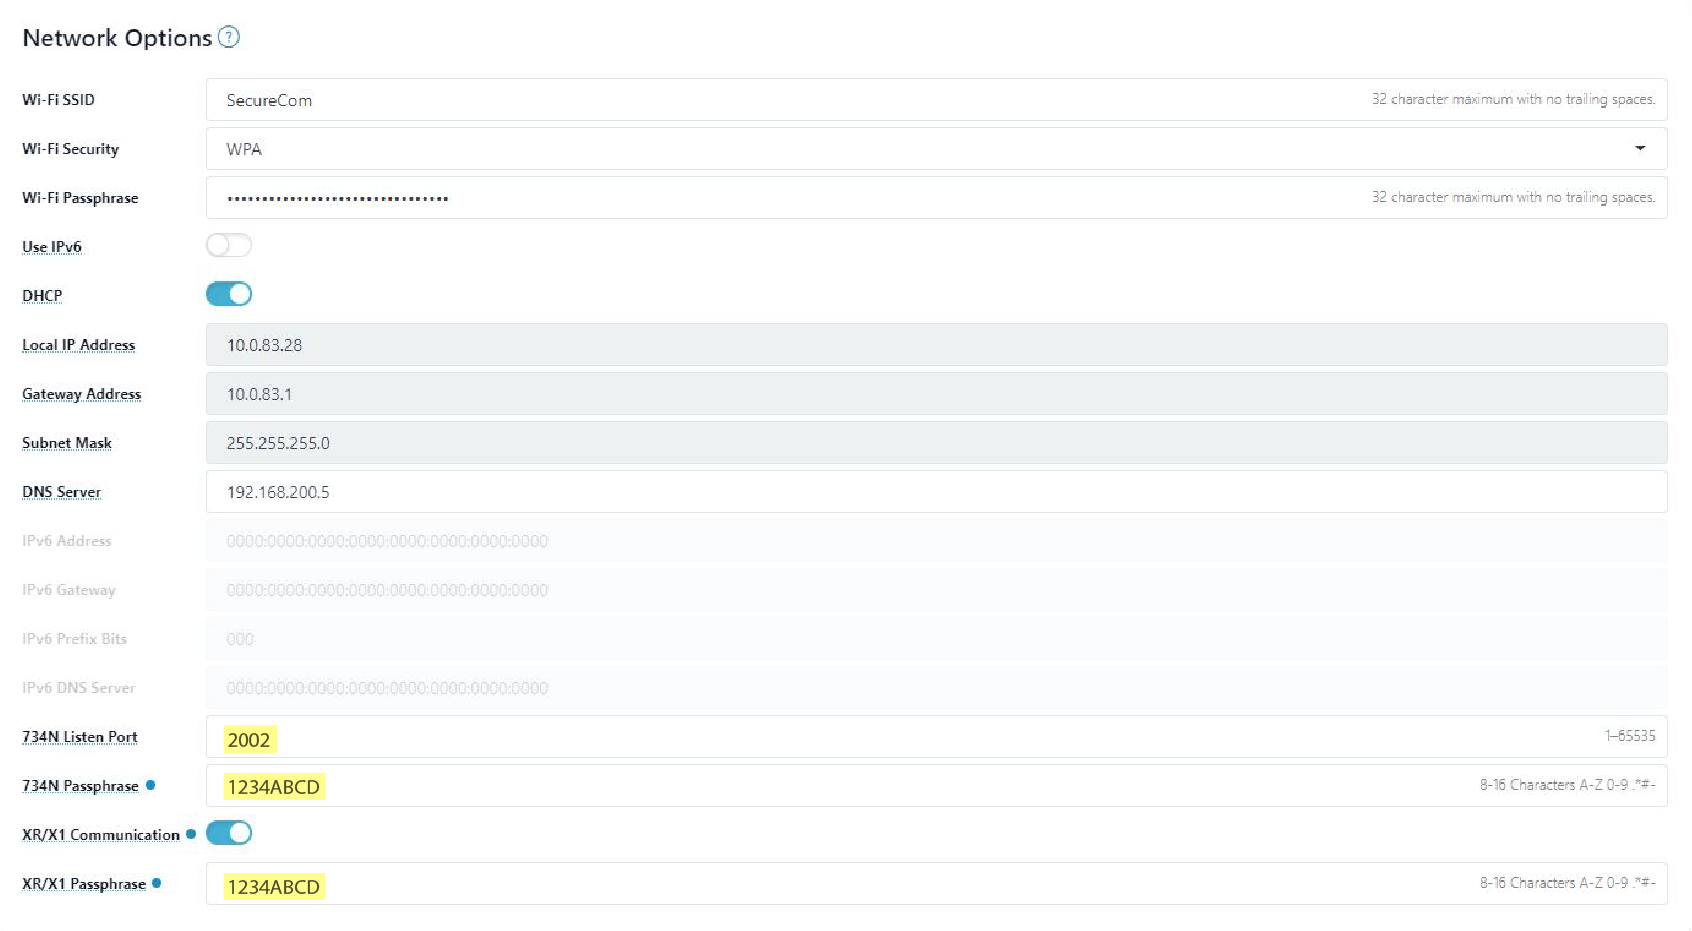
Complete Network Options Fields
Click Send All Changes in the top right corner to save the programming changes.
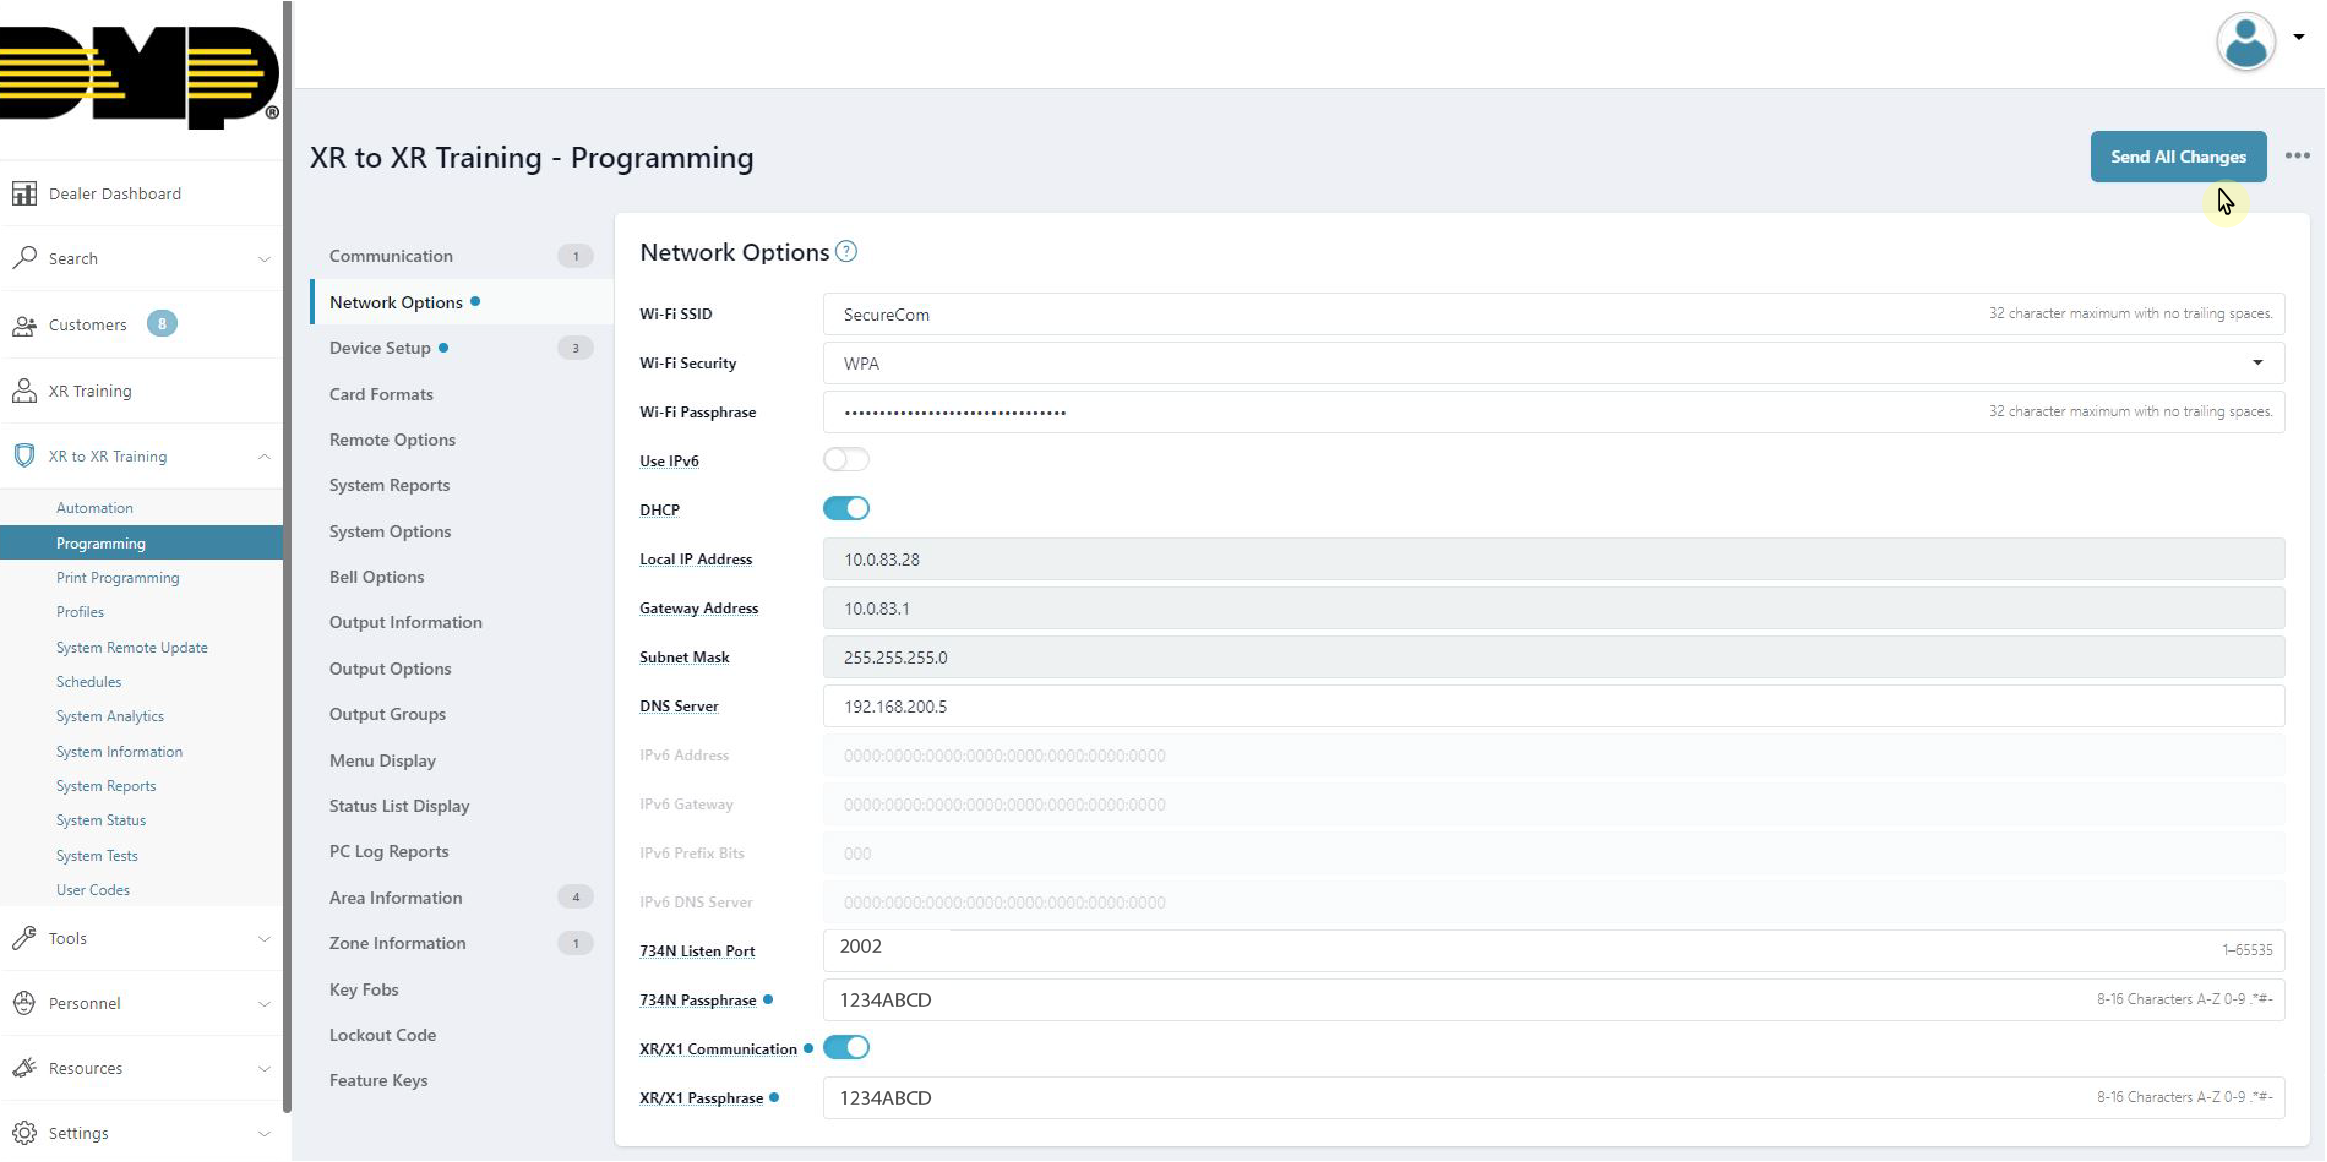
Send All Changes
Sub Panel Programming
Select the system you want to be the sub panel (the panel that will connect to the host panel).
Go to Network Options and ensure that the following fields are completed.
734N Listen Port - A port is filled in (Default is 2002)
734N Passphrase - A passphrase is filled in (Programmer/Technician can choose the passphrase)
XR/X1 Communication - The toggle is turned ON
XR/X1 Passphrase - A passphrase is filled in (Programmer/Technician can choose the passphrase)
Complete Network Options Fields
Click Send All Changes in the top right corner to save the programming changes.
Send All Changes
Best Practices
Each individual panel needs to be fully programmed before connecting to another panel, including their individual Communication Path, Areas, Zones, etc.
All panels need to use Area Arming. Areas that exist in the host panel have to exist in the sub panel, meaning there will be the same number of areas on each panel even if some panels do not have zones assigned to those areas. Areas across all panels will arm and disarm together. When the area is armed and a zone is tripped, the only panel that will go into alarm is the panel where the zone was tripped. All keypads will display an alarm, but only the panel with the tripped zone will be in alarm.
When programming Zones, use a specific name and as many identifying qualities as possible. Any labels such as the building name, door, geographic location (N, S, E, W), etc. should be included in the zone name. The name will be displayed across all keypads and sent to the Monitoring Center when it is in alarm. This will provide a clear understanding of where to send help upon arrival. If there is a Faulted Zone when arming, the zone will display as faulted on all keypads.
Users are added on a per panel basis but do not need to be the same across all panels. For example, if a user is programmed in Panel A but not Panel B, they will only be able to interact with the system from Panel A. If Panel B goes into alarm, the user will only be able to go to Panel A to disarm the site and cancel the alarm. If they go to Panel B and try to enter their user code, the panel will not recognize them as a user and will say invalid code.
Use Case Scenario
There is a site with multiple buildings, each with a dedicated XR Series panel. Each building has a main entrance and a side entrance.
The main entrances of each building follow the same schedule. Building 1, Building 2, and Building 3 main entrances disarm at 7:00 AM and arm at 7:00 PM. They are assigned to Area 1 to arm and disarm during their scheduled times.
The side entrances of each building do not follow the same schedule as Area 1. Building 1, Building 2, and Building 3 side entrances disarm at 8:00 AM and arm at 5:00 PM. They are assigned to Area 2 to arm and disarm during their scheduled times.
If the side entrance of Building 3 goes into alarm at 6:00 PM, the keypads at Building 1, Building 2, and Building 3 will display the alarm with the zone number and zone name. Only the alarm from Building 3 will be sent to the Monitoring Center. A user at Building 2 can go to the panel and disarm the system if they are a user at that building and cancel the alarm for Building 3.